1. 配置 Github 图床
1.1 创建图床仓库
在 GitHub 上创建一个专门存放图片的仓库(例如 my-images)。
- 必须设置为 Public(公开),否则加速源(CDN)无法抓取图片。
1.2 配置 Obsidian
-
安装 PicList
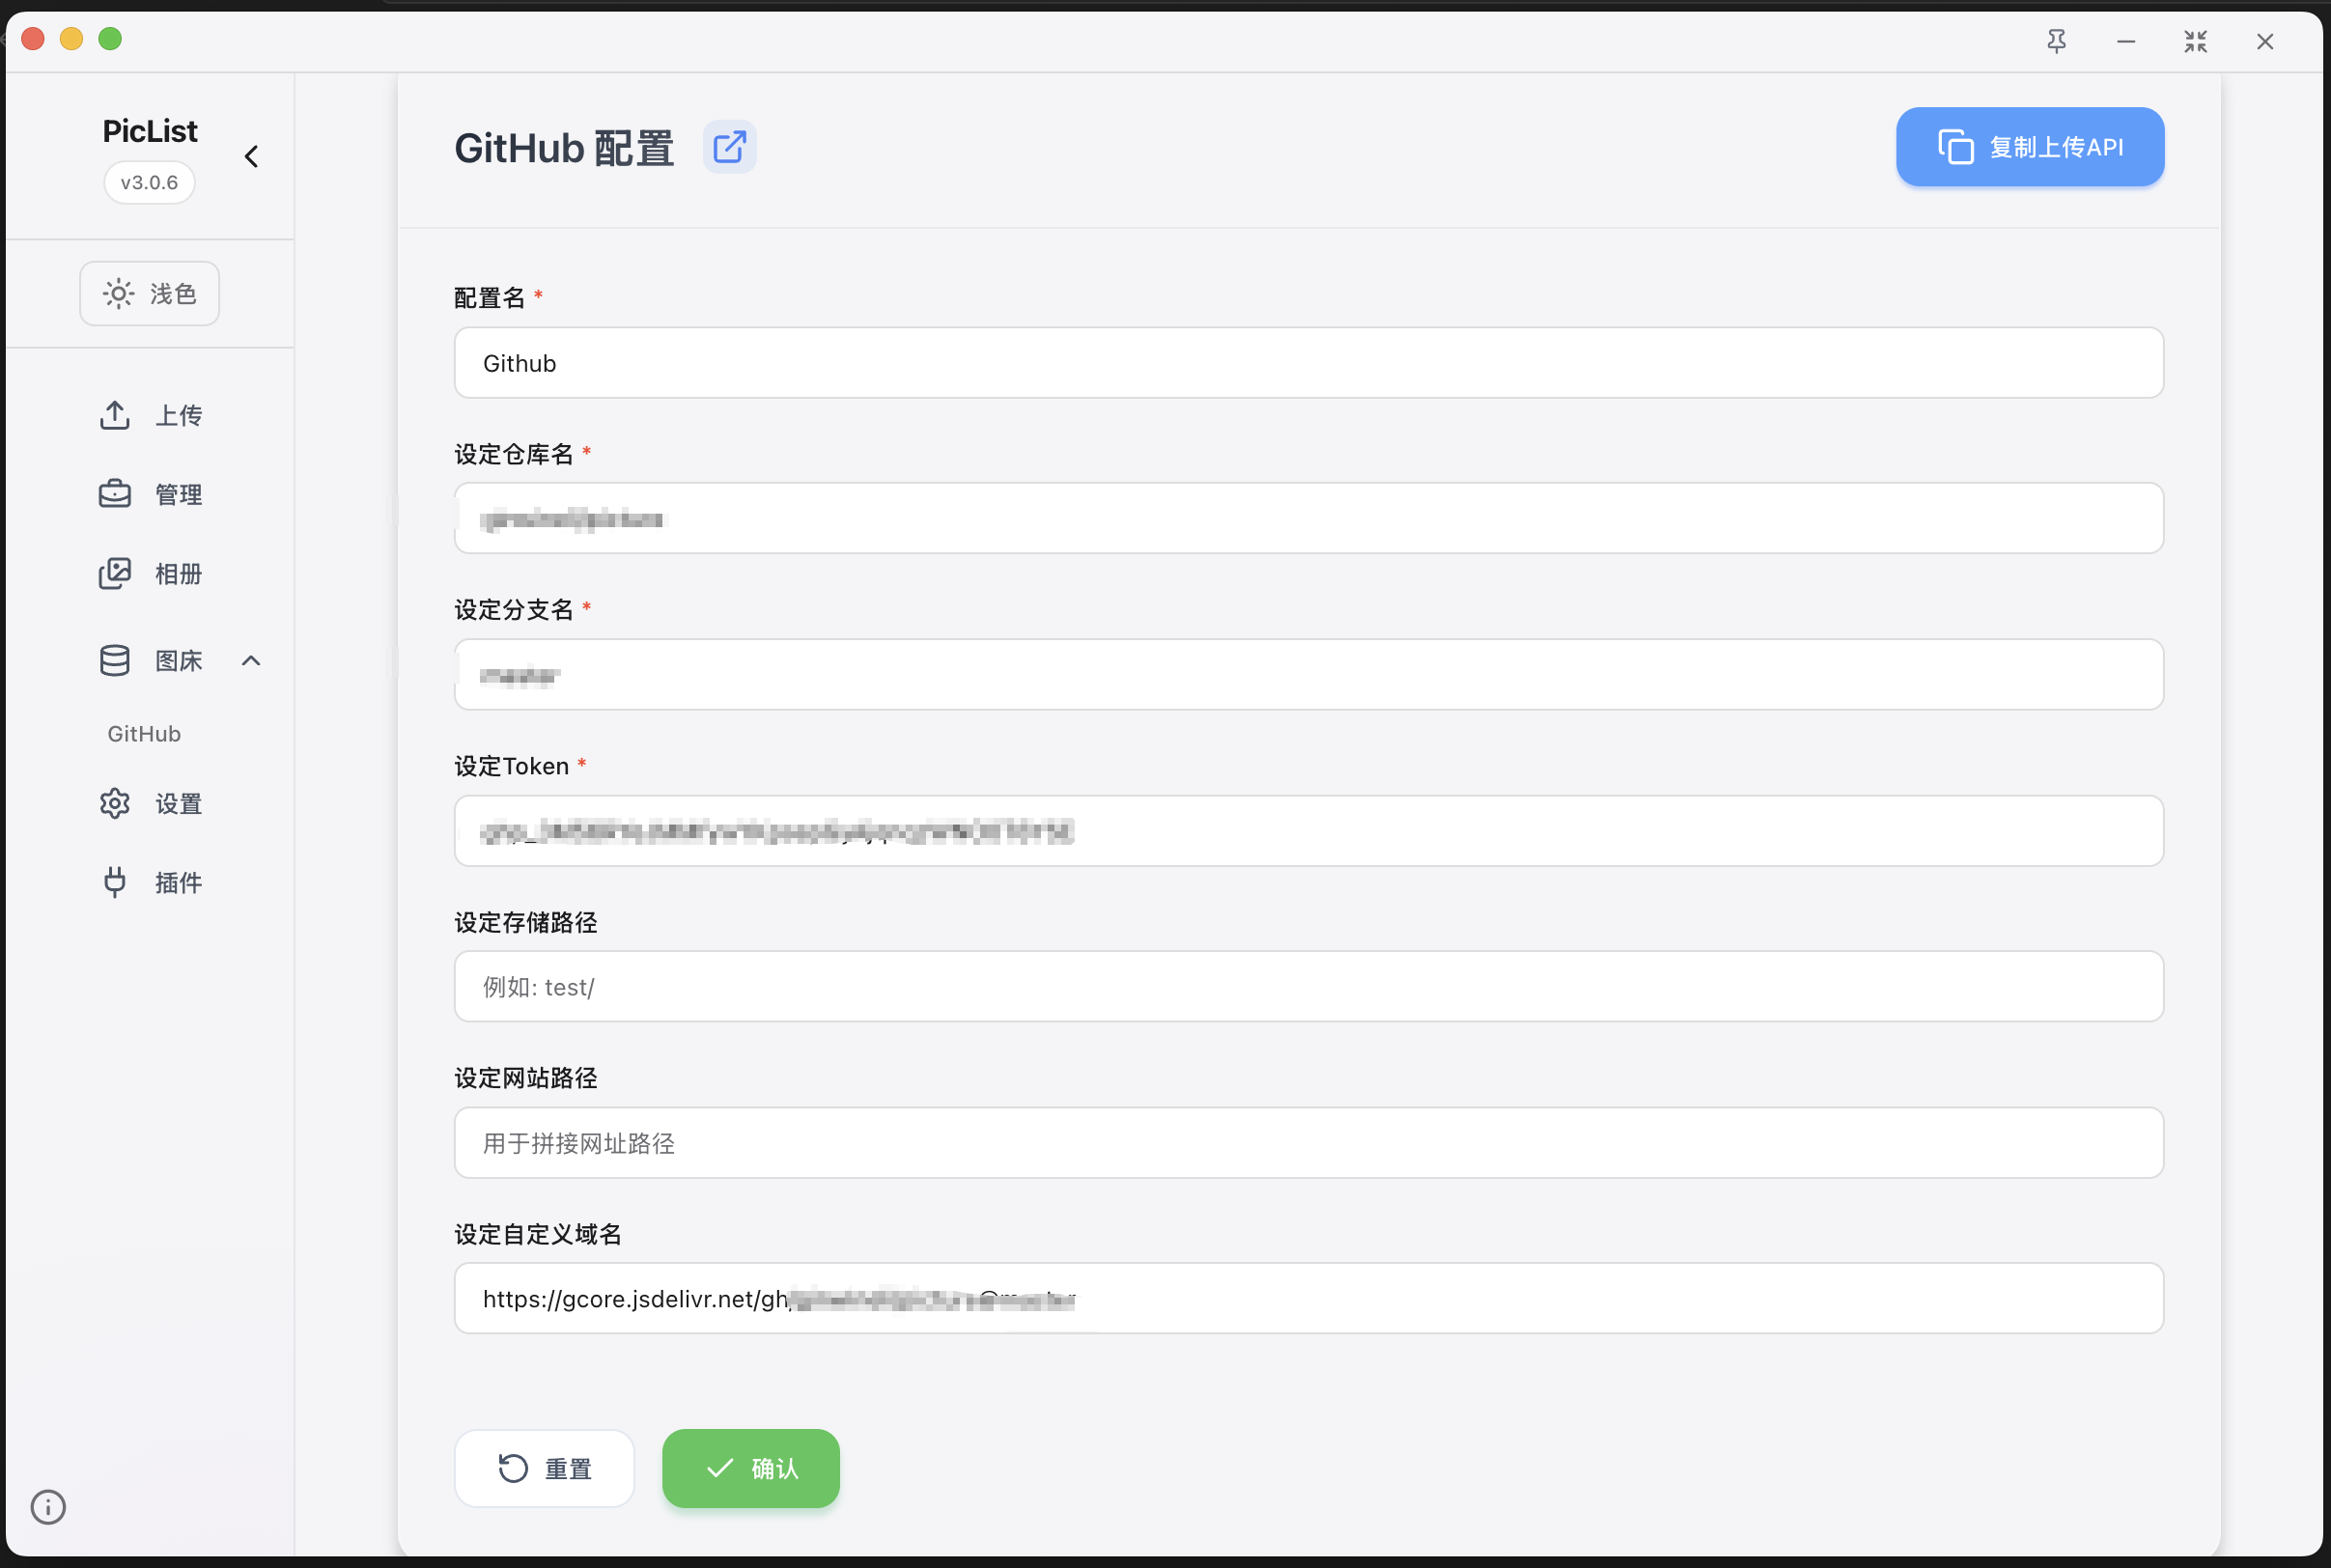
- 图床设置->github
- Token 填入你的 GitHub PAT1
- 自定义域名: gcore.jsdelivr.net/gh/[UserName]/[repo]@[branch]
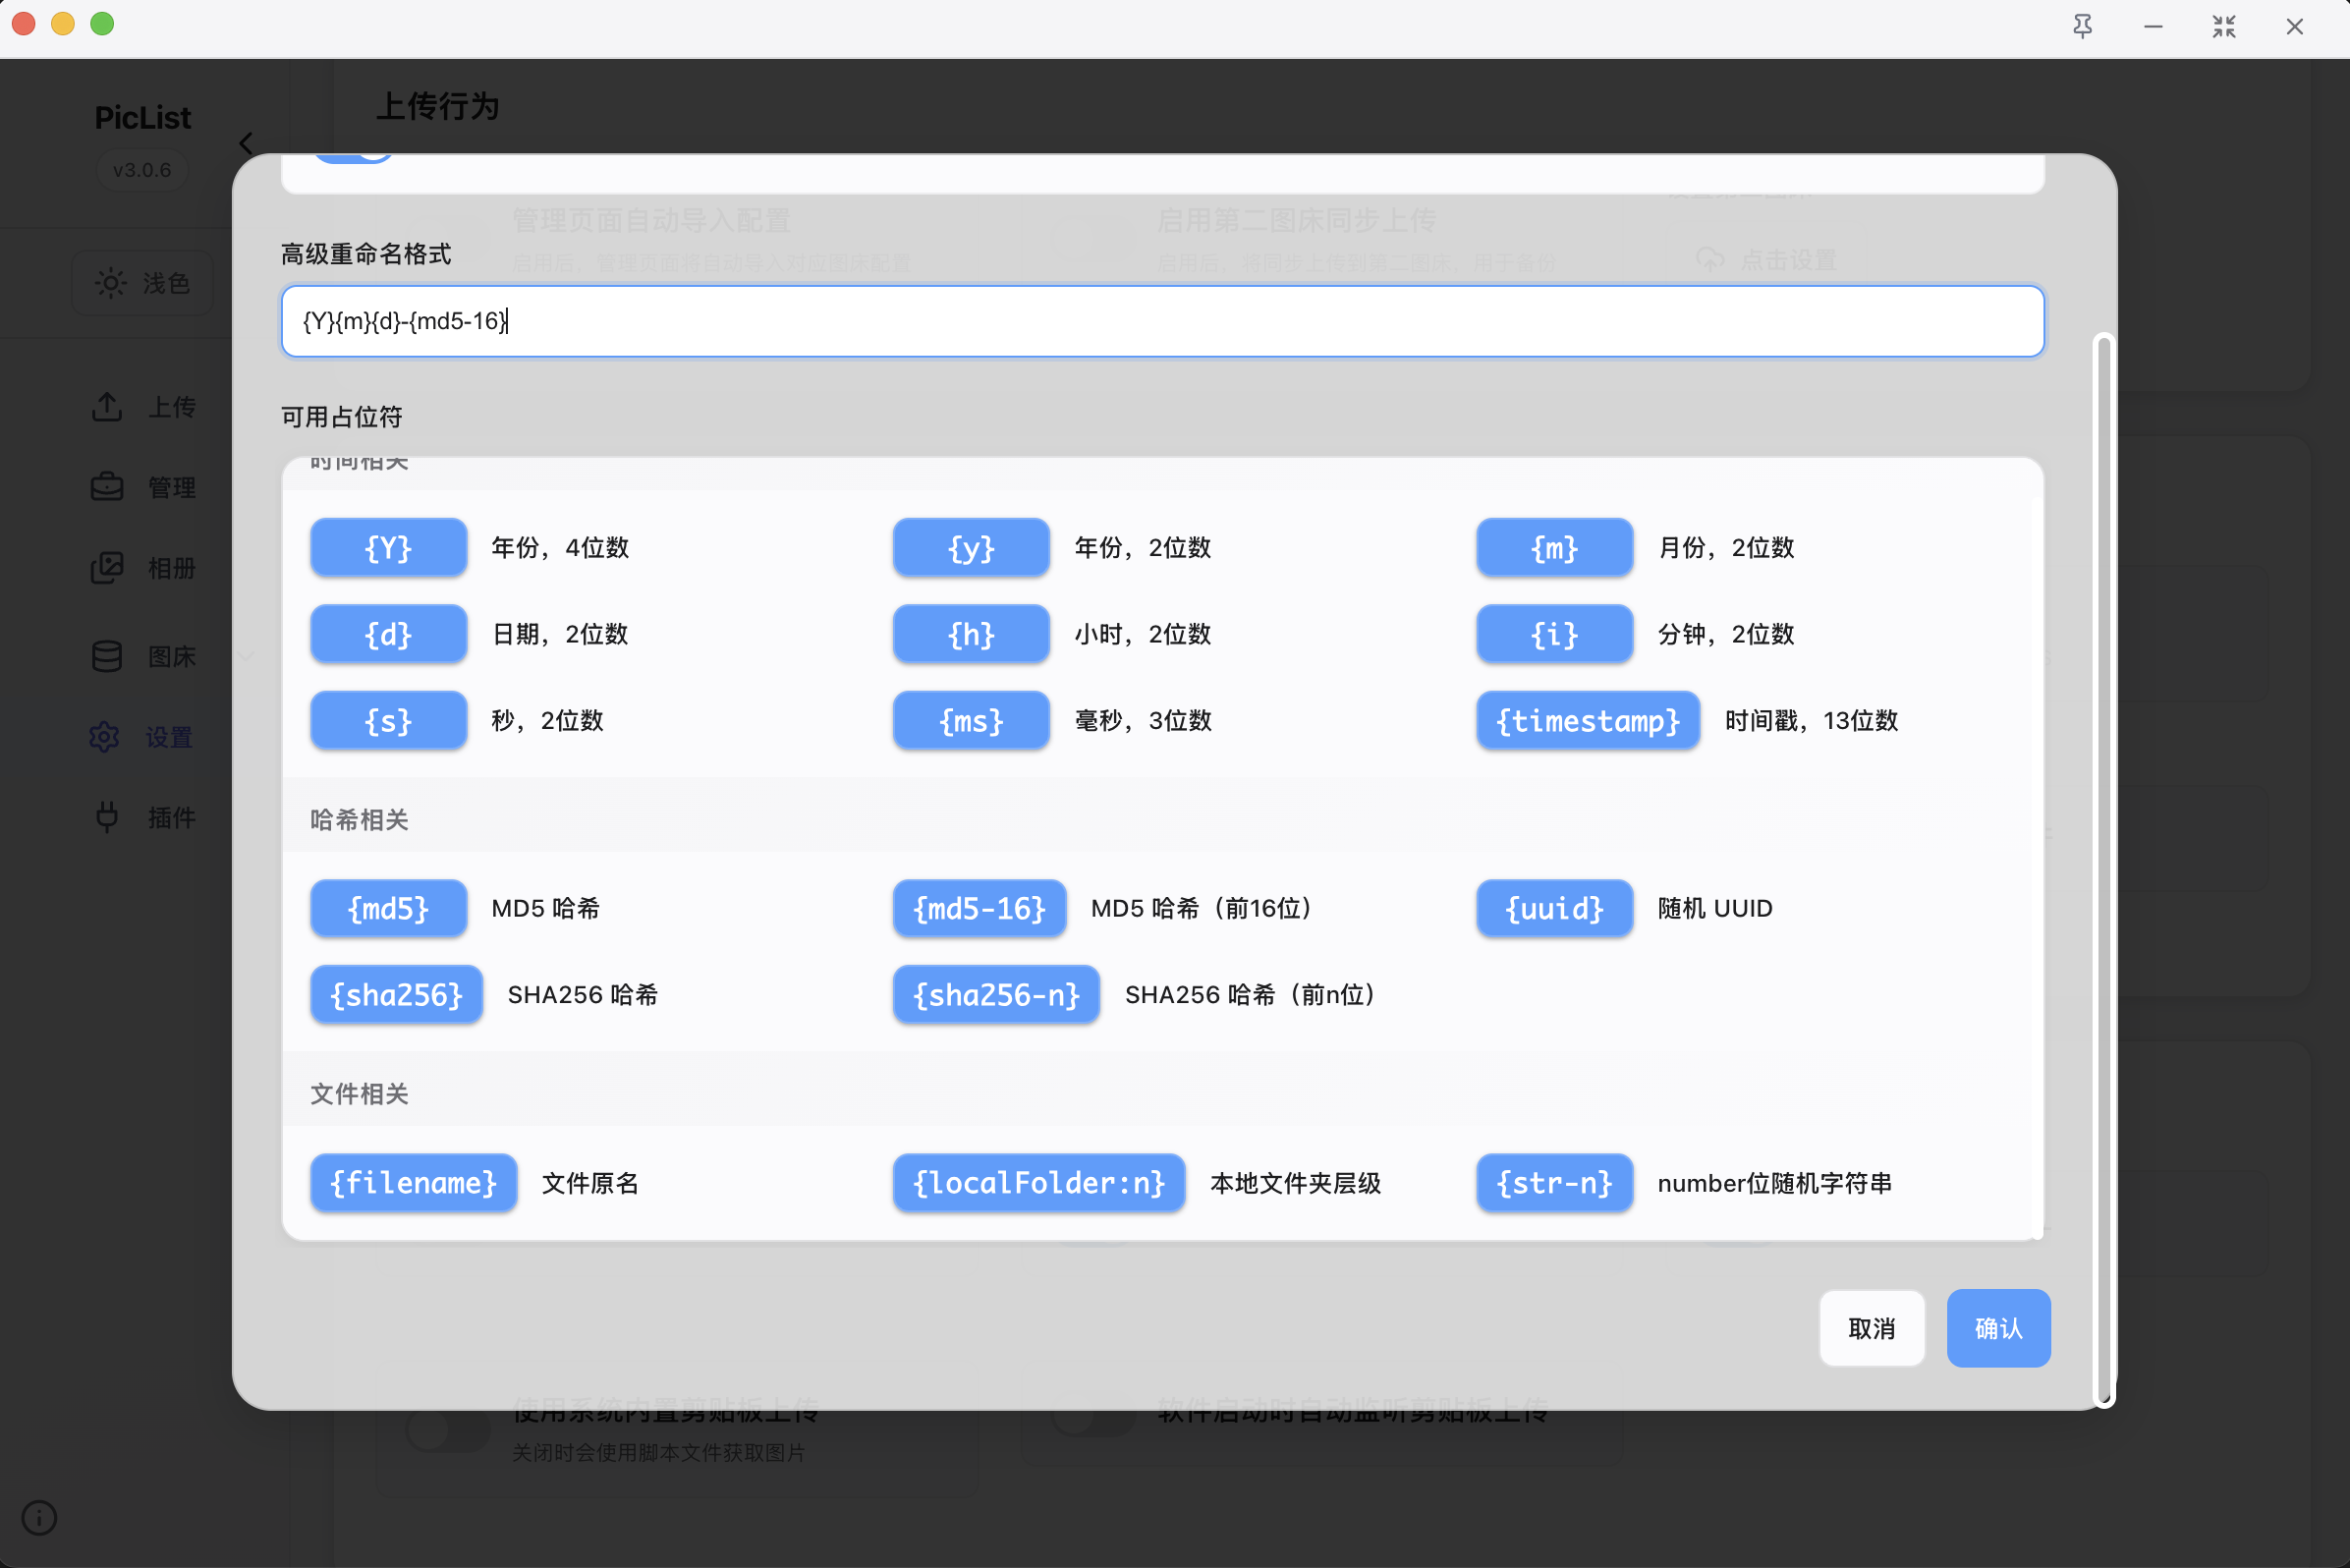
- 设置高级重命名
- Obsidian 安装 Image Auto Upload 插件设置中,将默认上传器改为 PicGo-APP(PicList 会模拟这个接口)。
2. 建立笔记仓库
2.1 建立本地笔记
我选择的是基于Astro的静态博客(https://github.com/saicaca/fuwari/blob/main/docs/README.zh-CN.md),如需选择 hexo 请参考官方文档。
pnpm create fuwari@latest- 通过配置文件
src/config.ts自定义博客 - 执行
pnpm new-post <filename>创建新文章,并在src/content/posts/目录中编辑 - 参考官方指南将博客部署至 Vercel, Netlify, GitHub Pages 等;部署前需编辑
astro.config.mjs中的站点设置。
2.2 建立 Github 仓库
创建github仓库,并且在本地初始化git仓库,将远程设置为github地址,上传到远程仓库
# 初始化gitgit init# 修改主分支名字为mastergit branch -m main master# 提交代码git add .git commit -m "feat: initial"# 设置远程git remote add origin git@github.com:xxx/xxxx.git# 上传代码git push -u origin master3. 托管网站到 Vercel
3.1 创建 Vercel 项目
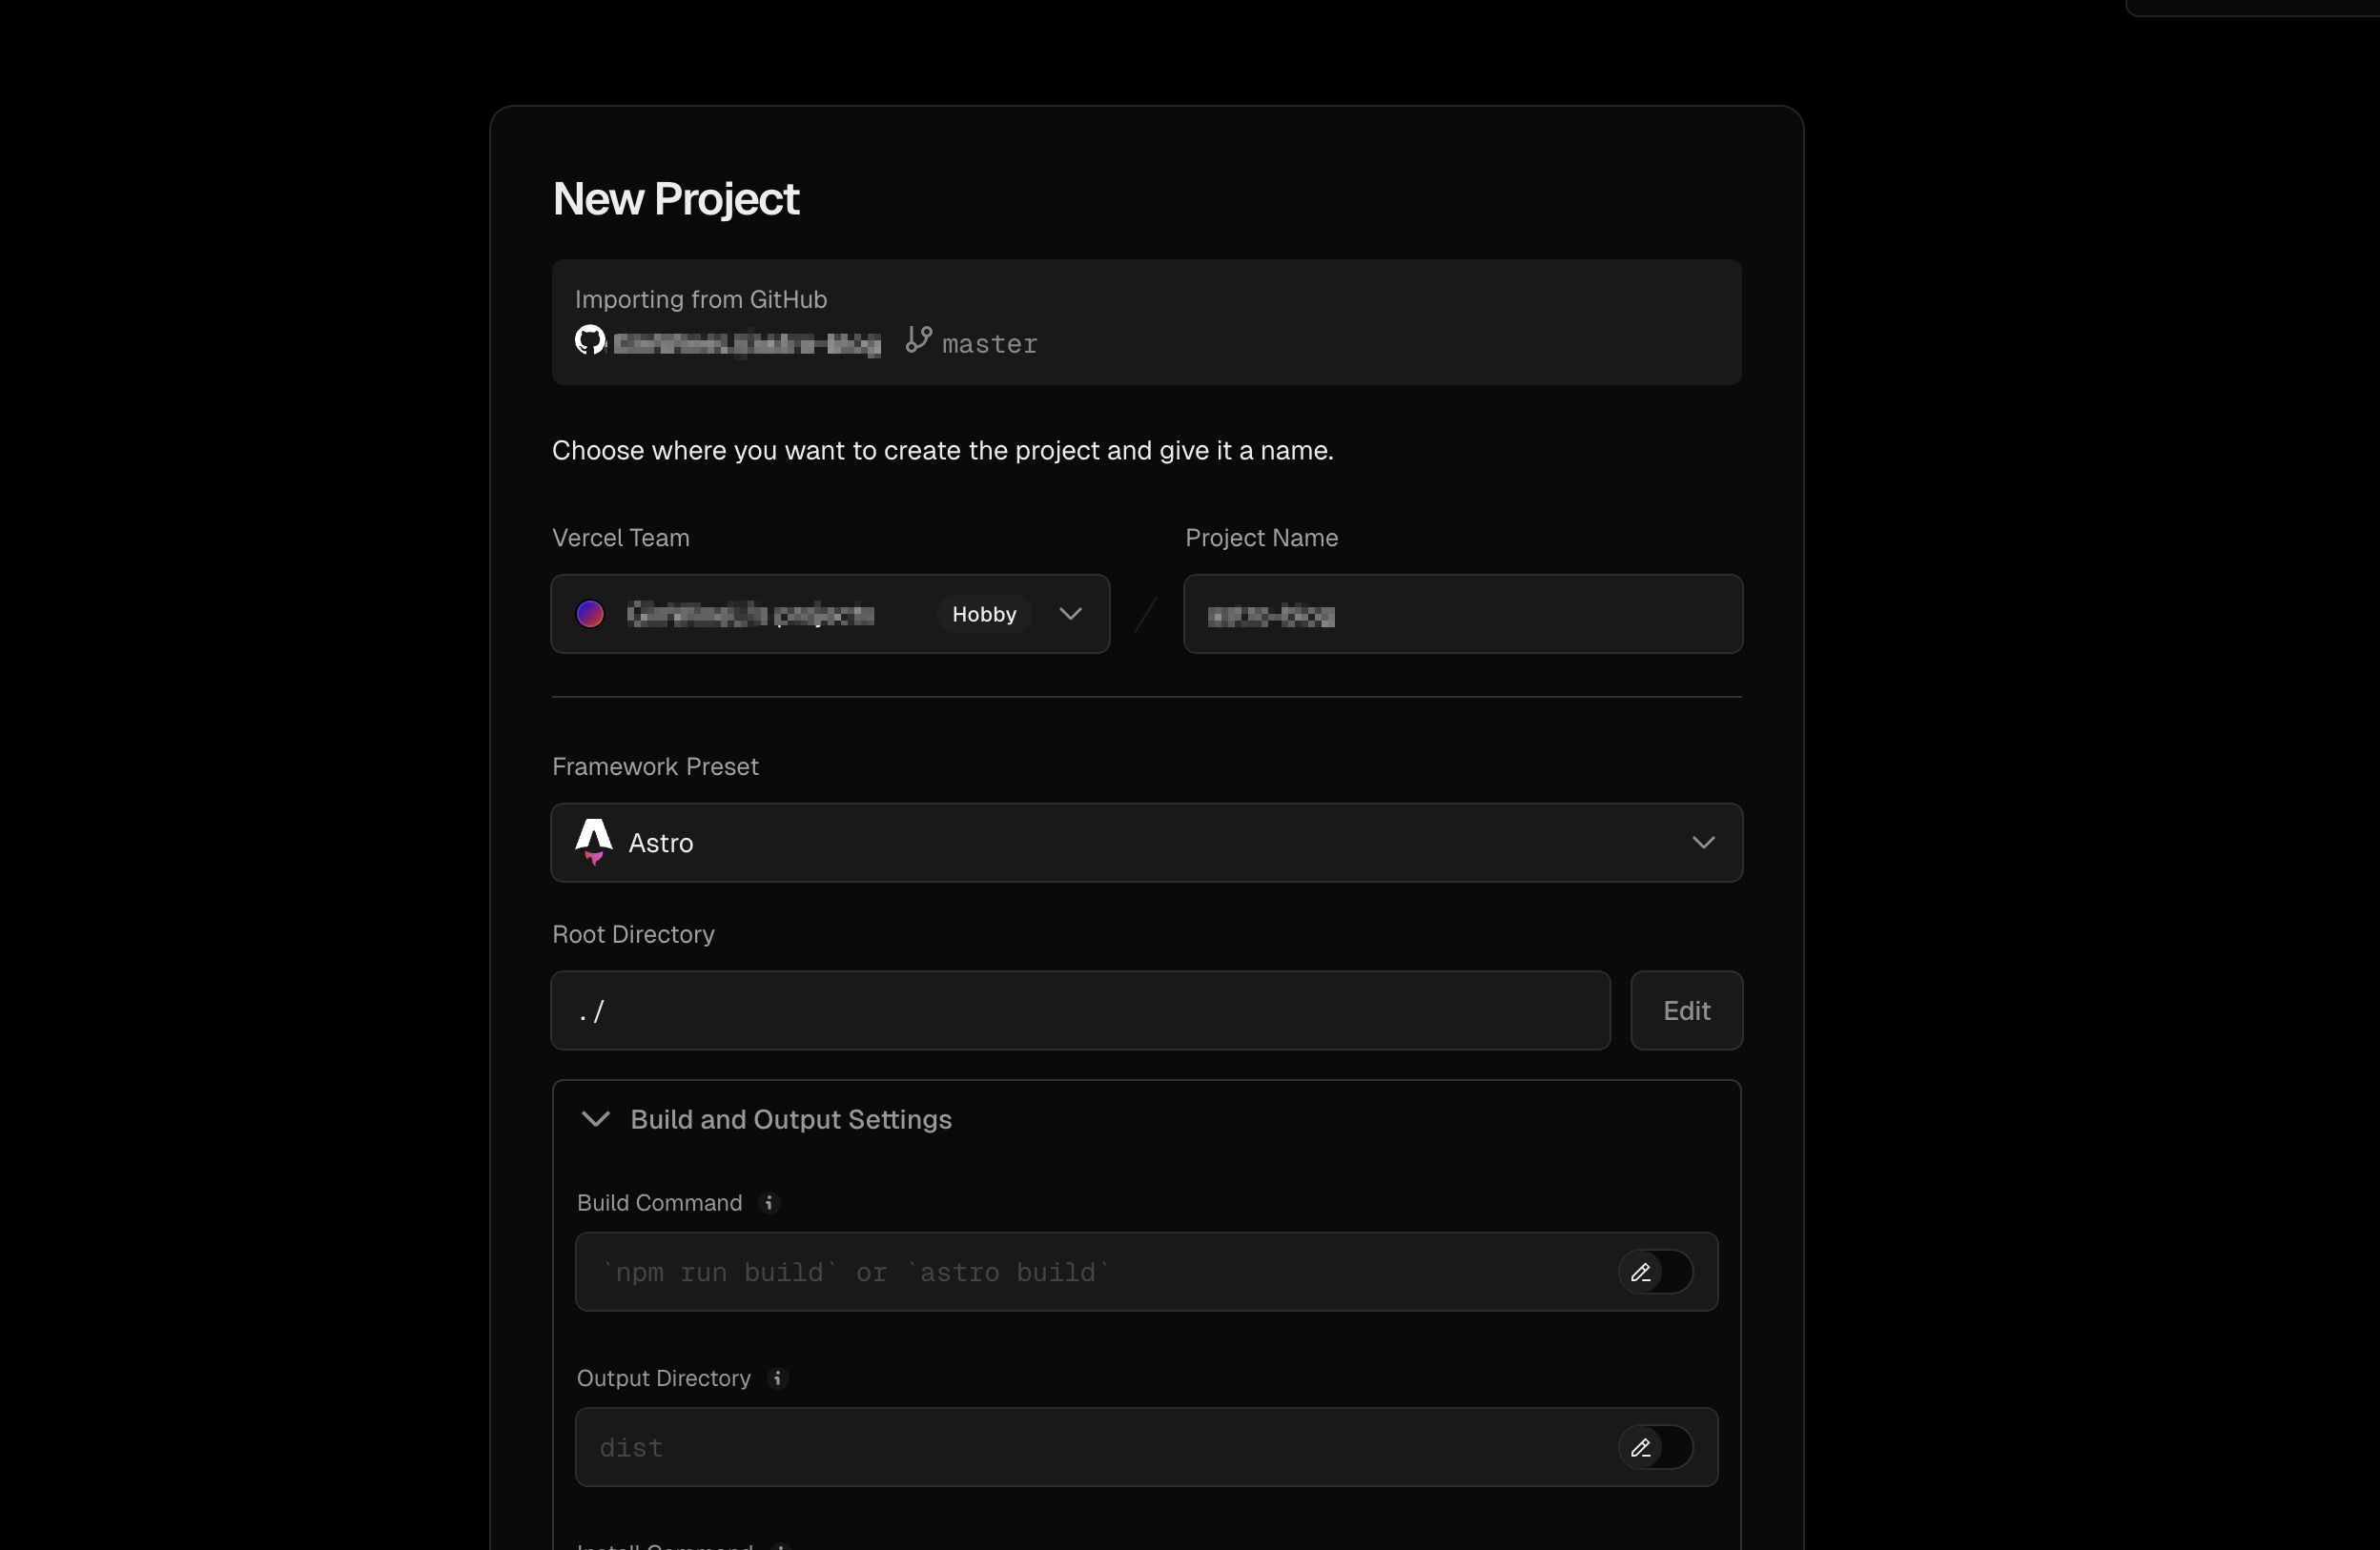
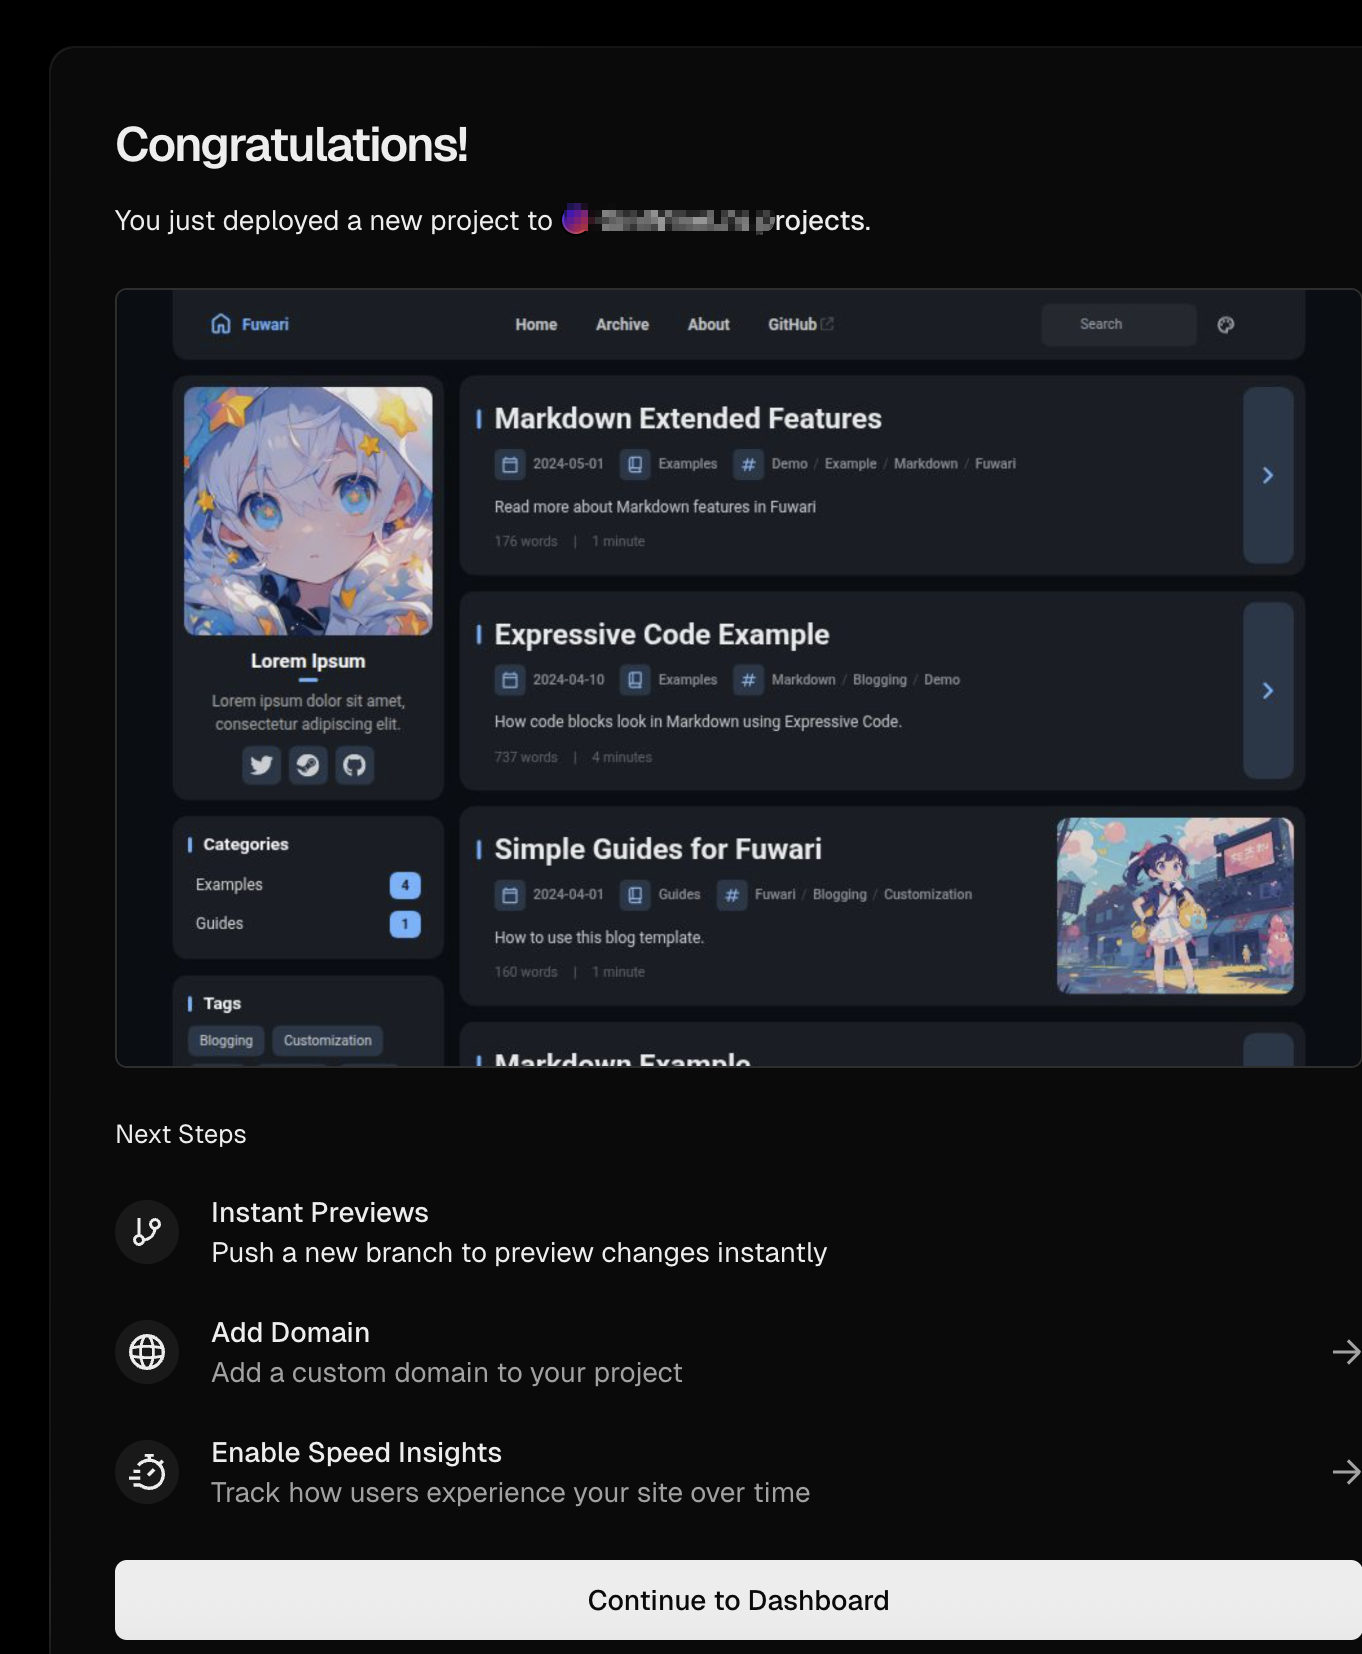
- 创建账号
- 导入github仓库
3.2 添加域名
vercel.app的域名由于大陆访问太多被ban掉了,因此需要添加我们自己的域名进行使用,这里使用阿里云进行演示
先在 Vercel 中添加域名
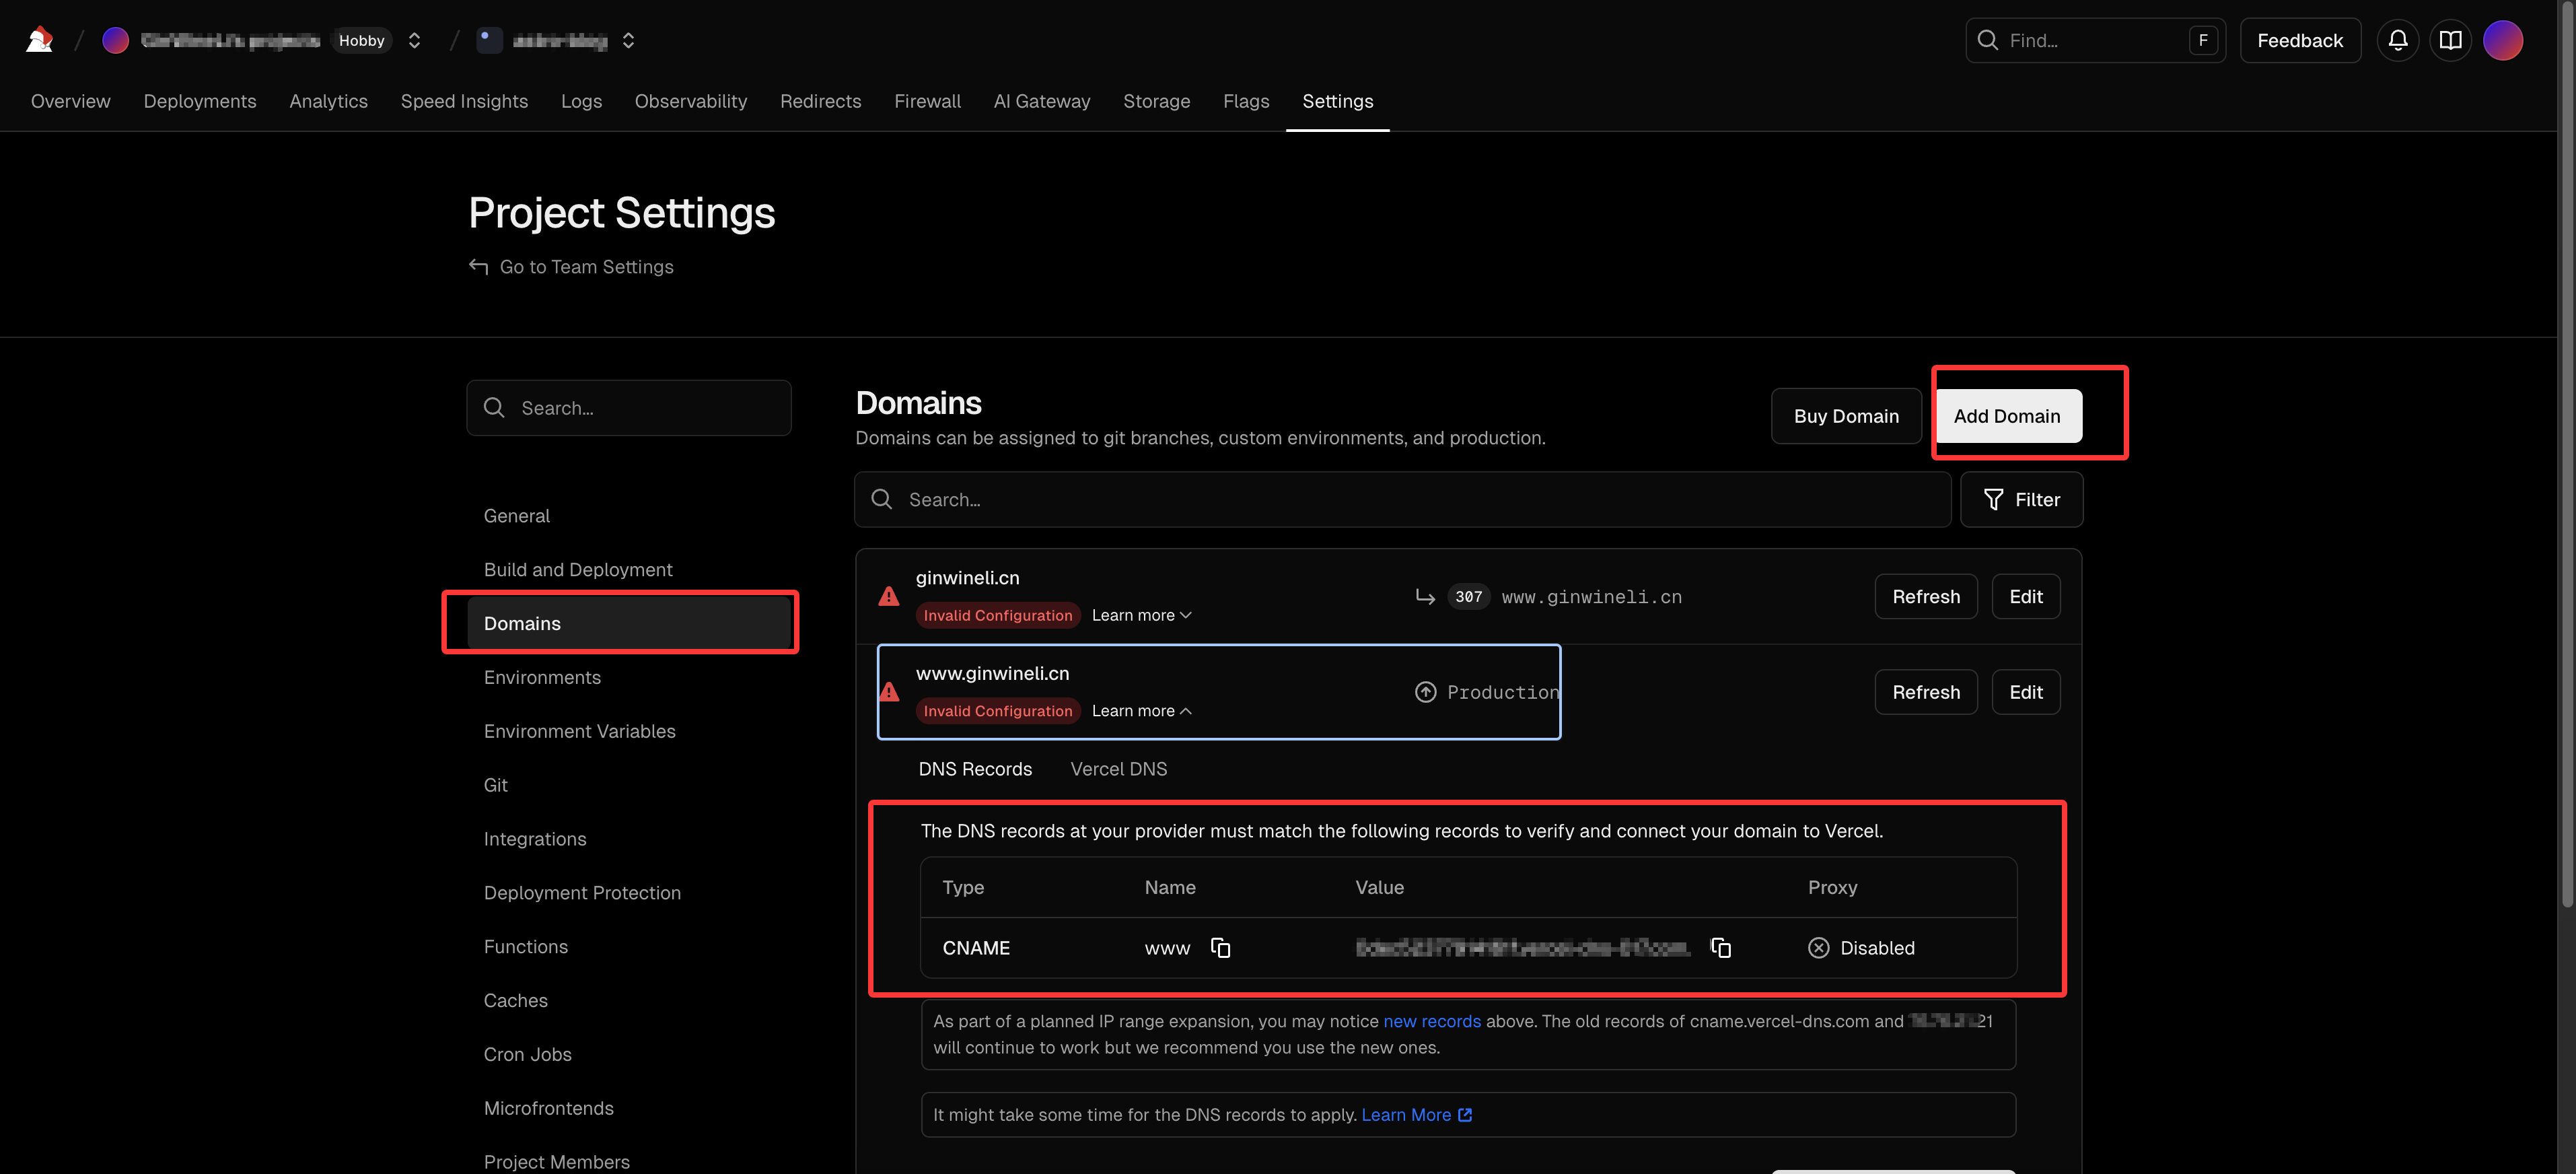
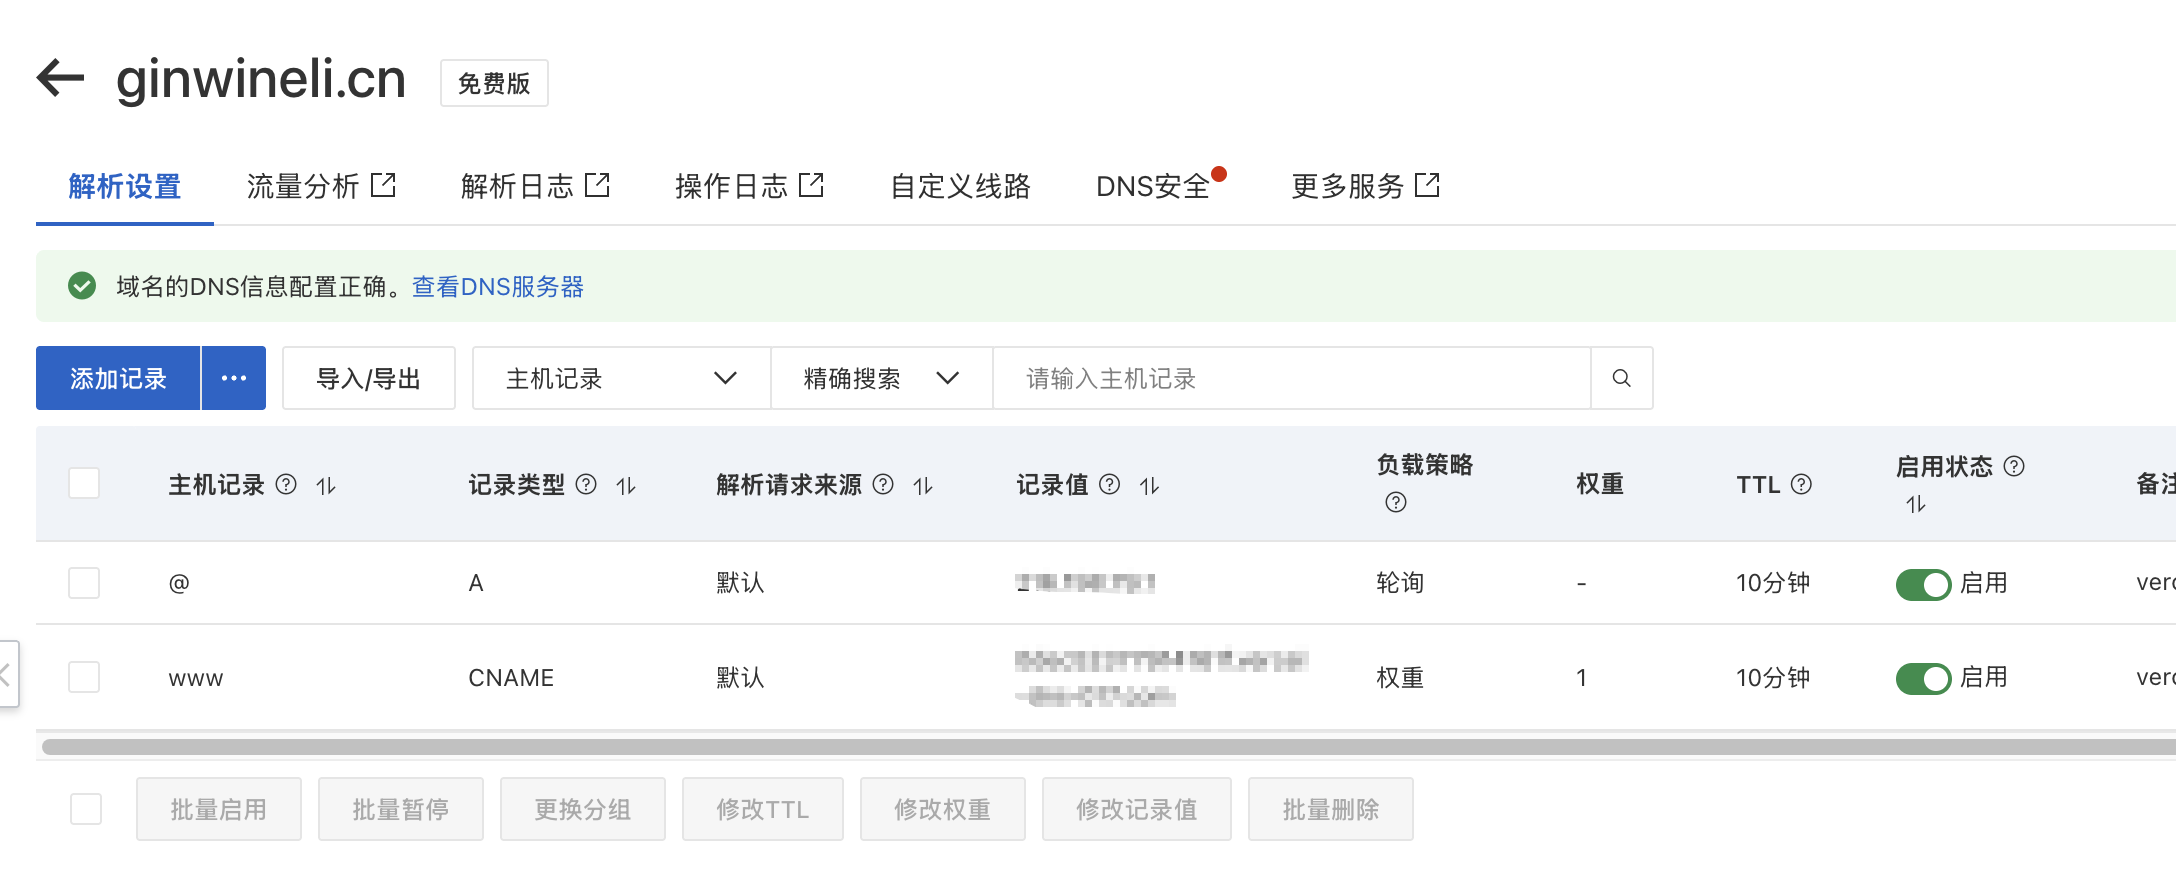
然后将 CNAME 的域名信息添加到阿里云域名控制台中,进入域名管理[https://dnsnext.console.aliyun.com/authoritative]
添加记录,将刚刚的相关信息填入其中,需要将域名与带www的域名解析信息都填入到阿里云控制台记录中

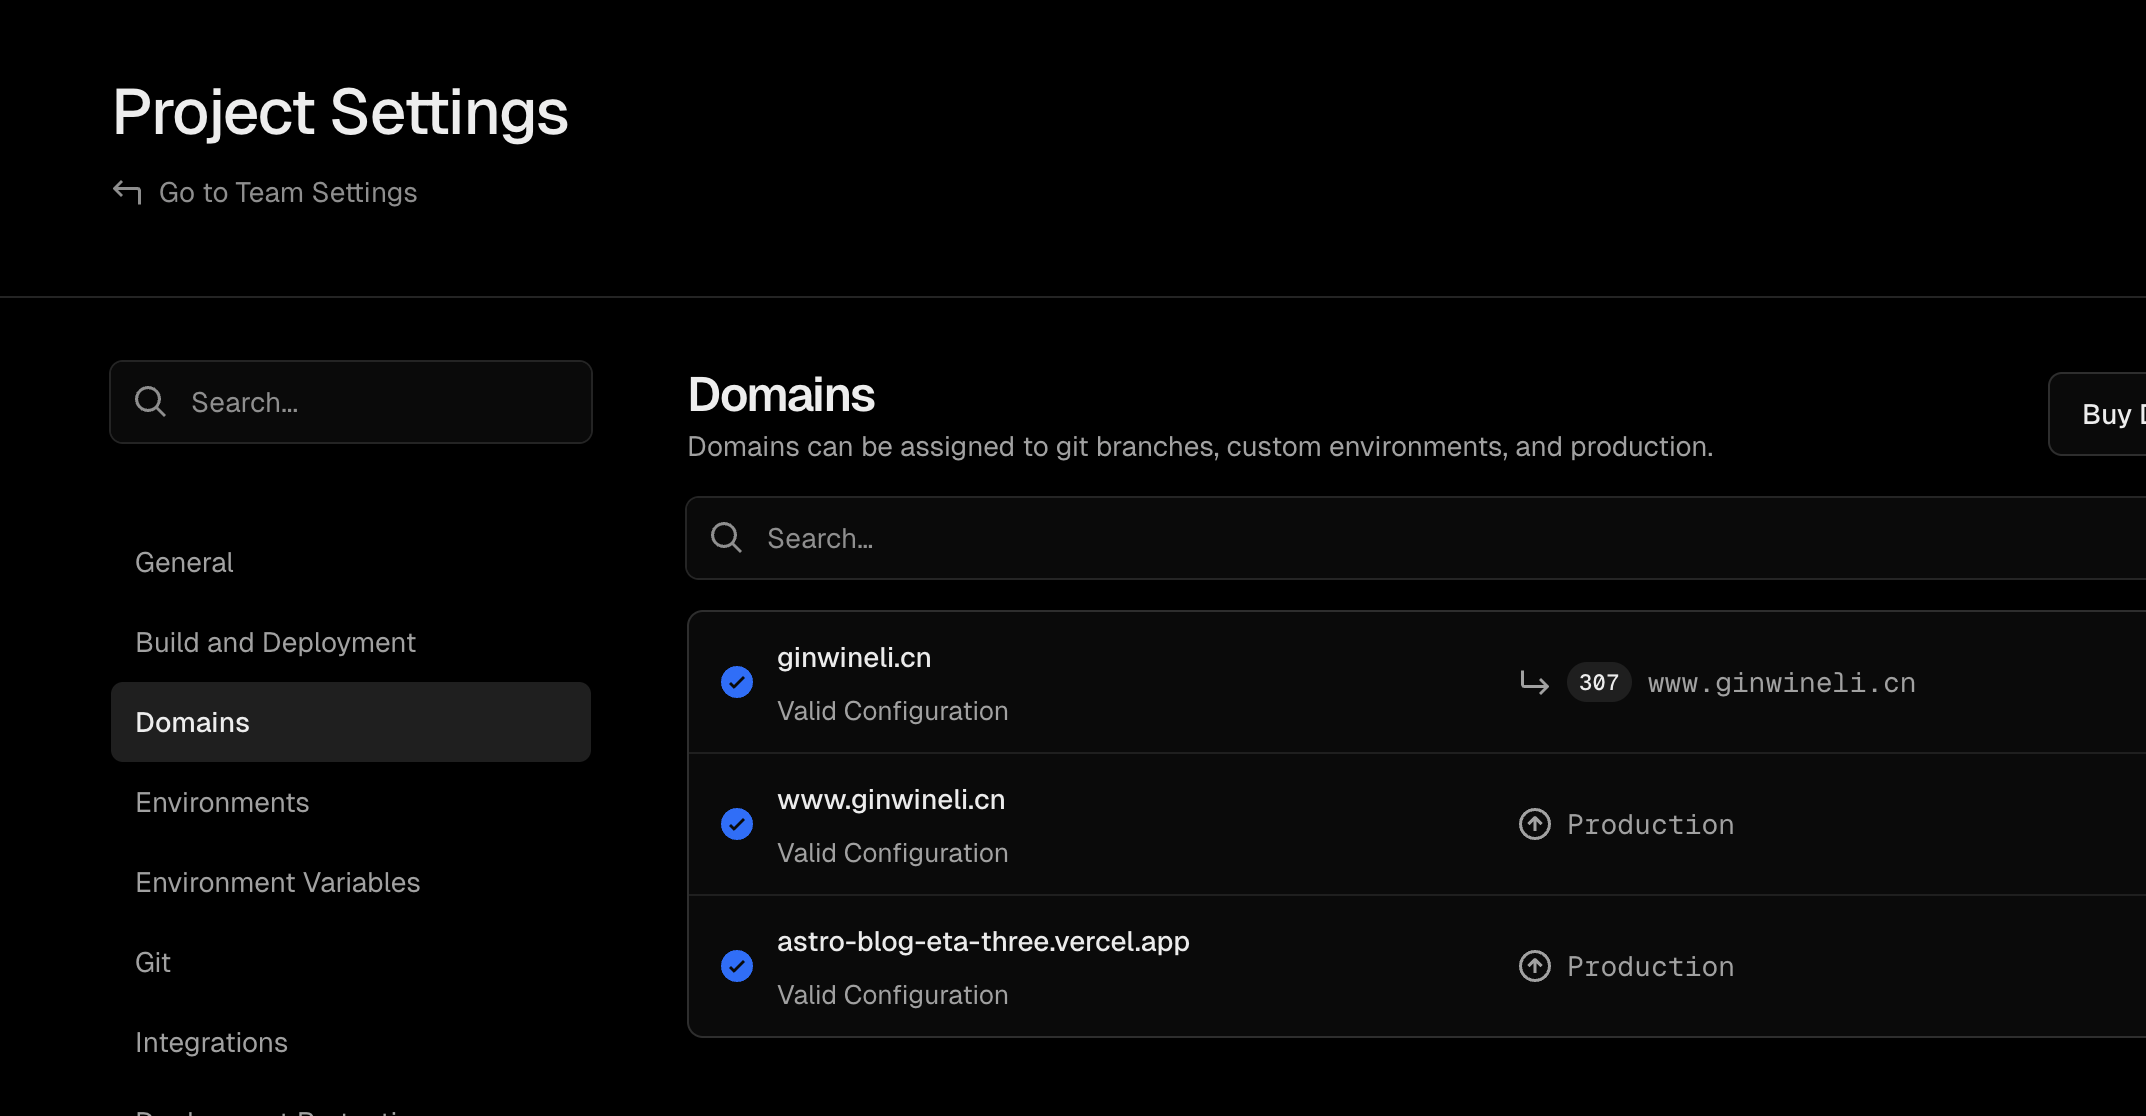
Vercel 验证成功后即可通过自己的域名进行访问了
4. 添加自动化发布
4.1 准备 Token
在 GitHub Settings 中生成一个 PAT 密钥,权限选 Contents: Read & Write
将 Token 填入 Obsidian 仓库的 Settings -> Secrets -> Actions 中,命名为 GH_PAT。
4.2 编写同步 Workflow
在 Obsidian 仓库根目录创建 .github/workflows/publish.yml:
name: Publish Notes to Blogon: push: branches: [master] # 当你 push 笔记时触发
jobs: publish: runs-on: ubuntu-latest steps: - name: Checkout Notes uses: actions/checkout@v4
- name: Checkout Blog uses: actions/checkout@v4 with: repository: [User]/[my-blog] # 修改为你的博客仓库名 token: ${{ secrets.GH_PAT }} path: blog-repo
- name: Filter and Sync run: | # 1. 清空博客仓库已有的文章目录(可选,确保删减同步) rm -rf blog-repo/src/content/posts/*
# 2. 寻找包含 'status: published' 的笔记并拷贝 # 假设你的笔记都在根目录或子目录下,这里递归搜索 .md 文件 grep -rl "status: published" . --include="*.md" --exclude-dir="blog-repo" | while read -r file; do # 保持文件名一致,拷贝到博客的 posts 目录 cp "$file" "blog-repo/src/content/posts/" done
- name: Push to Blog run: | cd blog-repo git config user.name "github-actions[bot]" git config user.email "github-actions[bot]@users.noreply.github.com" git add . git commit -m "Update posts from Obsidian: $(date)" || exit 0 git push5. 补充解决双仓库差异提交问题
5.1 修改博客仓库.gitignore
# 忽略由 GitHub Actions 自动同步的笔记文件夹src/content/posts/*# 确保不忽略目录本身,只忽略内容!src/content/posts/.gitkeep从 Git 索引中移除已存在的文件 即使加了忽略,如果该目录下已有文件,Git 仍会追踪。你需要在本地 astro-blog 目录下运行:
git rm -r --cached src/content/postsgit add .git commit -m "chore: 彻底将笔记目录移出本地追踪范围"git push origin master5.2 修改笔记仓库 Action
name: Publish Notes to Blogon: push: branches: [master]
jobs: publish: runs-on: ubuntu-latest steps: - name: Checkout Notes uses: actions/checkout@v4
- name: Checkout Blog uses: actions/checkout@v4 with: repository: [User]/[my-blog] # 修改为你的博客仓库名 token: ${{ secrets.GH_PAT }} path: blog-repo fetch-depth: 0 # 必须拉取全部历史才能进行 rebase
- name: Filter and Sync run: | # 1. 准备目录 mkdir -p blog-repo/src/content/posts/ rm -rf blog-repo/src/content/posts/*
# 2. 递归查找并按结构拷贝 find . -name "blog-repo" -prune -o -name "*.md" -print | while read -r file; do if grep -q "status: published" "$file"; then dest_dir="blog-repo/src/content/posts/$(dirname "$file")" mkdir -p "$dest_dir" cp "$file" "$dest_dir/" fi done
- name: Push to Blog run: | cd blog-repo git config user.name "github-actions[bot]" git config user.email "github-actions[bot]@users.noreply.github.com"
# 3. 强制添加被 .gitignore 忽略的内容 git add src/content/posts/ --force git add .
# 4. 检查更新并合并推送 if git diff --staged --quiet; then echo "没有笔记更新。" else git commit -m "Update posts from Obsidian: $(date)" # 先拉取远程最新提交(包含你本地手动推送的配置),把笔记提交接在后面 git pull origin master --rebase -X theirs git push origin master fi6. 接入 Google Analytics
参考文档:https://shinya.click/fiddling/astro-google-tag-manager/
6.1 安装 @astrojs/partytown
pnpm install @astrojs/partytown6.2 修改代码
<head> 标签所在文件中添加以下代码
<script is:inline src="https://www.googletagmanager.com/gtag/js?id=G-XXXXXXXXX" type="text/partytown"></script><script is:inline type="text/partytown"> window.dataLayer = window.dataLayer || []; window.gtag = function () { dataLayer.push(arguments); }; window.gtag('js', new Date()); window.gtag('config', 'G-XXXXXXXXX');</script>is:inline指示脚本在客户端执行type="text/partytown"指示脚本由 partytown 执行,而不在主线程执行gtag函数必须定义为 window 对象的一个函数变量,不能定义为一个函数声明
在 astro 的配置文件(形如是 astro.config.ts 或 astro.config.mjs)中添加以下配置
import partytown from '@astrojs/partytown'
export default defineConfig({ // ... integrations: [partytown({ config: { forward: ['dataLayer.push', 'gtag'] } })],});